This post will show you: how to create dynamically user's interfaces using the cWidgets widget. This widget will let you create various different widgets like text inputs, buttons, combo boxes , check boxes, option buttons, radio buttons, etc.
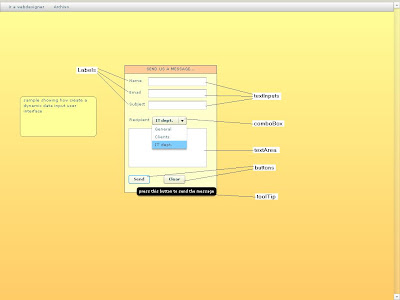
The first step to use the cWidgets widget is ensure it is in the HB server. for more info about this read the post titled 'accessing databases with Hummingbird and scripting, part I', section 'uploading a widget to the hummingbird server'.
The cWidgets is visible only at design time.
On this case the page we are working on has the name database4. following is at design time:
The cWidgets is visible only at design time.
On this case the page we are working on has the name database4. following is at design time:
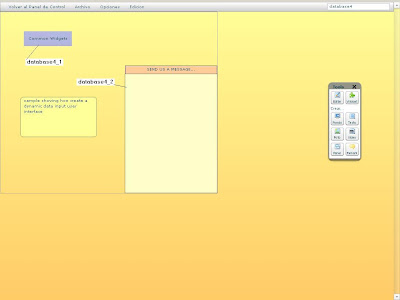
database4_1 corresponds to the cWidget and database4_2 is a panel component. The code for the different events next:
imports event:
import mx.collections.ArrayCollection; // we need this to use ArrayCollections
import mx.controls.Alert; // needed if we want to show messages alerts
/*
we will use the next variable to syncronize the creation of
the widget cWidget in database4_1 with the creation of
the panel database4_2
*/
global.flag=0; // this variable will allow us to detect when the widget and the panel are created
// The next are needed for communication with the midleware
import Connection; // needed to connect with the midleware
/*
next we create an connection object and stored it in a global variable (con)
for later use
*/
global.con=page.newConnection();
// loading of the loadPolicy file in order to have acces to the remote call procedures
global.con.loadPolicyFile("http://alex.cl/WebServPortalFlex/crossdomain.xml");
// open the connection to the midleware (made with asp.net)
global.con.openConnection("http://alex.cl/WebServPortalFlex/Gateway.aspx");
database4_1_ready event:
global.flag++;
if (global.flag==2) // the widget and the panel are ready, so we create our interface
create_interface();
database4_2_onCreated event:
global.flag++;
if (global.flag==2) // the widget and the panel are ready, so we create our interface
create_interface();
functions event:
function create_interface()
{
/*
this function create our interface dynamically
*/
// get a reference to the cWidget
var o=page.findObject2("/database4_1");
if (o!=null)
{
// use the cWidget reference to create some objects
// create label 'name' and a textInput
var l1=o.content.application.new_label();
l1.text='Name';l1.x=10;l1.y=10;
var t1=o.content.application.new_textInput();
t1.x=60;t1.y=10;t1.width=150;
// create label 'email' and a textInput
var l2=o.content.application.new_label();
l2.text='Email';l2.x=10;l2.y=40;
var t2=o.content.application.new_textInput();
t2.x=60;t2.y=40;t2.width=150;
// create label 'subject' and a textInput
var l3=o.content.application.new_label();
l3.text='Subject';l3.x=10;l3.y=70;
var t3=o.content.application.new_textInput();
t3.x=60;t3.y=70;t3.width=150;
// create label 'recipient' and a comboBox
var l4=o.content.application.new_label();
l4.text="Recipient";l4.x=10;l4.y=110;
var c1=o.content.application.new_comboBox();
c1.editable=false;
c1.x=70;c1.y=110
var dataP=new ArrayCollection();
dataP.addItem({label:'General',data:'0'});
dataP.addItem({label:'Clients',data:'1'});
dataP.addItem({label:'IT dept.',data:'2'});
c1.dataProvider=dataP;
c1.addEvents("change");
c1.toolTip='select the recipient';
c1.height=20;
// apply some styles to the combo
c1.setStyle("cornerRadius", 4);
c1.setStyle("selectionColor", 0xffcc99);
c1.setStyle("rollOverColor", 0xffcc66);
//pa.addChild(o.content.application.new_checkBox());
// create textArea for the message
var t4=o.content.application.new_textArea();
t4.x=10;t4.y=140;t4.width=200;t4.height=100;
// create a 'send' button
var b1=o.content.application.new_button();
b1.label="Send";
b1.x=10;b1.y=260;
b1.toolTip='press this button to send the message';
b1.id="send";
b1.addEvents("click");
// create a 'clear' button
var b2=o.content.application.new_button();
b2.label="Clear";
b2.x=100;b2.y=260;
b2.toolTip='press this button to clear all the data';
b2.id="clear";
b2.addEvents("click");
// we will add the above objects inside a panel
// we get a reference to the panel
var pa=page.findObject2("/database4_2");
if (pa!=null)
{
// now we add the just created objects to the panel
pa.addChild(l1);
pa.addChild(l2);
pa.addChild(l3);
pa.addChild(t1);
pa.addChild(t2);
pa.addChild(t3);
pa.addChild(l4);
pa.addChild(c1);
pa.addChild(t4);
pa.addChild(b1);
pa.addChild(b2);
/*
save references to texinputs, combobox and textarea into
global variables for use in others events
*/
global.t1=t1;
global.t2=t2;
global.t3=t3;
global.c1=c1;
global.t4=t4;
}
}
} // end of function create_interface
On the above script you must notice the line where i put an id to the buttons and the line using the addEvents method. These lines will allow us work with the click events of the both buttons in order to detect when the user click the 'send' or 'clear' button, like you will see later.
These are all our events for the moment. you can see them on the scripts window next: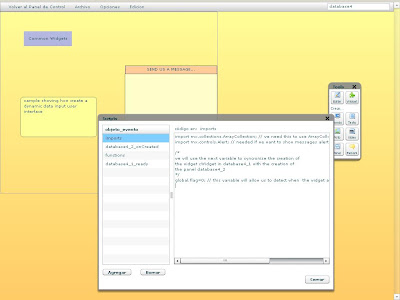
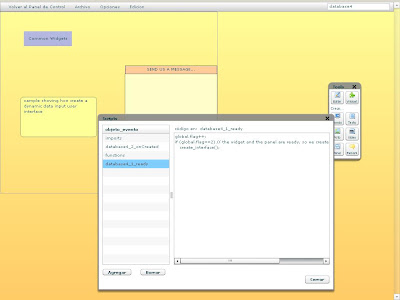
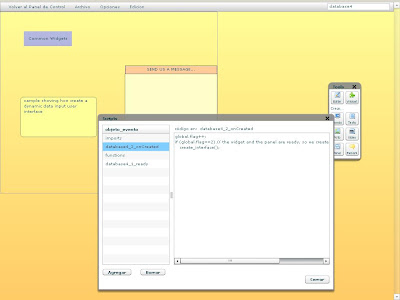
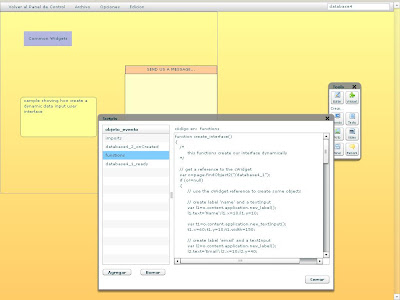
At this point you will have the interface, but it don't make anything when the user press the buttons, for that you will need add the next event:
database4_1_buttonClick event:
/*
this event script will be called for all the click events of the
buttons created with the cWidget database4_1
you can identify every button for its id property like showed below
*/
switch(me.id)
{
case 'send':
// send button pressed
var name=global.t1.text;
var email=global.t2.text;
var subject=global.t3.text;
var recipient=global.c1.selectedLabel;
var message=global.t4.text;
// you must validate the data according some criteria
// after validation you proceed to send the message
global.con.call("WebServPortalFlex.servicios.sendMail","serverResponse","serverError",name,email,subject,recipient,message);
break;
case 'clear':
// clear button pressed
global.t1.text="";
global.t2.text="";
global.t3.text=""
global.c1.selectedIndex=0;
global.t4.text="";
break;
}
serverResponse event:
Alert.message("your message was sended");
serverError event:
Alert.message("there was an error trying to send your message");
On the sample showed on this post you must create the midleware code that receive the data from the HB page and send the email, using (on this case) asp.net. if you need more info about creating the midleware layer with asp.net read the post titled "Accessing databases with hummingbird and scripting part II".
A nice thing about locate the interface inside the panel is that you can move the panel with the mouse on the designer, in order to locate all the interface inside it where you want. :)
A nice thing about locate the interface inside the panel is that you can move the panel with the mouse on the designer, in order to locate all the interface inside it where you want. :)


No comments:
Post a Comment