Friday, June 3, 2011

Tuesday, May 17, 2011

Creating Windows on HB


On this post i will show you the way you can create and manage windows on HB.

Following is the image showing the HB page we will working on at design time:


the components on the page are:

- database7_1, database7_2: are text, when the user click on 'create windows' we will create three windows, and when click on 'close all windows' all the windows opened will be closed.
- database7_3: this widget will allow us to create windows. we will can move the windows on the page dragging with the mouse from the window's title area.
- database7_4: we will use this widget to create a 'canvas' object, then we will load some HB page inside it and finally we will put the canvas inside the window.

following is the page at visit time:


On the next image you can see how we can move the windows on the page using the mouse:


and next is the code for every event to do this page work:

database7_1_onClick event:

// here we create some windows using the widget

var pagesToLoad=new Array();
pagesToLoad.push('jaime2');
pagesToLoad.push('jaime4');
pagesToLoad.push('jaime5');

var o=page.findObject2('/database7_3');
if (o!=null)
{
for (var i = 0 ;i < pagesToLoad.length ; i++)
{
var w=o.content.application.new_window();
w.title='Window '+(i+1);
// si no especificamos el ancho y alto de la ventana, esta se ajustará a su contenido
w.closeButton(true,w.constant_remove); // show close button
// we want respond to some events
w.addEvents('close|mouseDownOutside','|','win');
// set some styles for the window
w.setStyle('borderColor',0x0099CC);
w.setStyle('borderThicknessLeft',3);
w.setStyle('borderThicknessRight',3);
// show the window
o.content.application.windowManager.addPopUp(w,page,false);
// center the window on the browser
o.content.application.windowManager.centerPopUp(w);


/*
no we create a canvas object, then add the canvas
to the window and load inside it an HB page
*/
var cw=page.findObject2('/database7_4');
var canvas=cw.content.application.new_canvas();
// si no especificamos el ancho y alto del canvas este se ajustara a su contenido
if (canvas!=null)
{
w.addChild(canvas);
page.cargar_pagina(canvas,pagesToLoad[i],'','');
global.canvasWindow=canvas;
}
} // fin ciclo for

}


database7_2_onClick
event:

// here we close all the popups
ac=page.getAllPopups();
if (ac.length>0)
{
var o=page.findObject2('/database7_3');
for (var i = 0 ; i < ac.length ; i++)
o.content.application.windowManager.removePopUp(ac[i]);
}

win_windowClose
event:

// a window is being closed for the user, you can do something here

win_windowMouseDownOutside event:

// the user clicks outside the window, you can do something here


Thursday, April 28, 2011

Communicating with data services of third party , YouTube sample - II


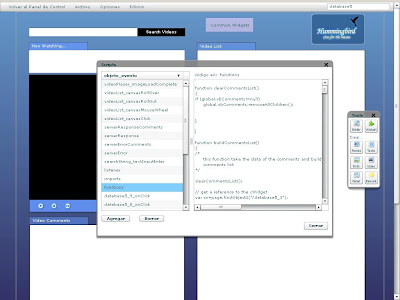
This is the second part of the YouTube Sample, which shows you how to connect to YouTube's data services. Following is the code of the others script events:

database5_3_ready event:

// create textInput to get the search string from the user
var cw=page.findObject2("/database5_3");
var t=cw.content.application.new_textInput();
t.y=40;t.x=33;t.width=277;
// next line: when user press enter will trigger searchString_textInputEnter event
t.addEvents('enter','|','searchString')
page.content.addChild(t);
global.t=t; // saves reference to the textInput for use it in other events


// CREATE AN IMAGE AND LOAD THE CHROMELESS PLAYER FROM YOUTUBE
var im=cw.content.application.new_image();
im.y=160;im.x=33;
im.width=399;im.height=377;
im.id="player";
im.addEvents("loadComplete",'|','videoPlayer');
im.source="http://www.youtube.com/apiplayer?version=3";
page.content.addChild(im);
global.vidPlayer=im; // saves reference to the player for use it in other events

// create a vertical box which will be the video list container
create_vBox();
// create a vertical box which will be the comments list container
create_vBoxComments();

setButtonMode(); // set button mode for some componentes


videoPlayer_imageLoadComplete event:


if (me.id="player")
{
// set a listener to 'watch' when the chromeless player contained
// inside this component is ready to interaction
me.content.addEventListener("onReady",page.g_scripts.listener);
}


listener event:

if (event.currentTarget==global.vidPlayer.content && event.type=='onReady')
{
/*
the chromeless video player triggered the onReadyEvent,
signaling is ready to be used
*/
var w=500;
var h=400; //w*3/4;
event.currentTarget.setSize(w, h);
}

searchString_textInputEnter event:

/*
here we send the search request to youtube
*/
searchVideos();

database5_1_onClick event:

/*
here we send the search request to youtube
*/
searchVideos();


serverResponse event:


// prepare some variables to store the video data
var videos=new ArrayCollection();
var video=null;

// get some namespaces from the xml data

var os = result.result.namespace("openSearch");//::totalResults;
global.totalResults=result.result.os::totalResults;


var ns= result.result.namespace("");
var gd = result.result.namespace("gd");
var media = result.result.namespace("media");
var yt = result.result.namespace("yt");

var vList=null;
vList = result.result.ns::entry;


for each(var vElement in vList)
{

video=new Object();
if (video!=null)
{
video.title = vElement.ns::title;
video.published = vElement.ns::published;
video.rating = Number(vElement.gd::rating.@average);
video.description = vElement.media::group.media::description;
video.keywords = vElement.media::group.media::keywords;
video.category = vElement.media::group.media::category;
video.thumbnail = vElement.media::group.media::thumbnail[0].@url;
video.duration = Number(vElement.media::group.yt::duration.@seconds);
//video.url = vElement.media::group.media::content.(@type == "application/x-shockwave-flash").@url;
video.url = vElement.media::group.media::content.(String(@url).substr(0,4) == "http").@url;
video.urlComments=vElement.gd::comments.gd::feedLink.@href;
//if(video.url != null && video.url.length > 0)
{
videos.addItem(video);
}
}

} // end of for each

global.videos=videos; // save the videos in the global variable

// now we build the videoList from the video list
buildVideoList();

showOneOf();


serverError event:

Alert.show('error calling video search');


serverResponseComments event:


// prepare some variables to store the comments
var comments=new ArrayCollection();
var comment=null;

// get some namespaces from the xml data

var os = result.result.namespace("openSearch");
global.totalResultsComments=result.result.os::totalResults;

var ns= result.result.namespace("");


var vList=null;
vList = result.result.ns::entry;


for each(var vElement in vList)
{

comment=new Object();
if (comment!=null)
{
comment.title = vElement.ns::title;
comment.published = vElement.ns::published;
comment.updated = vElement.ns::updated;
comment.content = vElement.ns::content;
comment.authorName = vElement.ns::author.ns::name;

{
comments.addItem(comment);
}
}

} // end of for each

global.comments=comments; // save the comments in the global variable

// now we build the commentsList from the comments list
buildCommentsList();

showOneOfComments();


serverErrorComments event:

Alert.show('error calling comments for video');


database5_5_onClick event:

// user click the play video button
if (global.vidPlayer==null)
{
// cromeless video player not instantiated
return;
}
global.vidPlayer.content.playVideo();


database5_6_onClick event:

// user click the pause video button
if (global.vidPlayer==null)
{
// cromeless video player not instatiated
return;
}
global.vidPlayer.content.pauseVideo();


database5_8_onClick event:

// user click the rewind video button
if (global.vidPlayer==null)
{
// cromeless video player not instatiated
return;
}
global.vidPlayer.content.seekTo(0, true);


database5_9_onClick event:

// back the video list to the previous page
if (global.startIndex-global.maxResults>=1)
global.startIndex=global.startIndex-global.maxResults;
else
global.startIndex=1;

searchVideos();


database5_10_onClick event:

// forward the video list to the next page
if (global.startIndex+global.maxResults<=global.totalResults)
global.startIndex=global.startIndex+global.maxResults;
else
{
global.startIndex=global.totalResults-global.maxResults;
if (global.startIndex<1) global.startIndex=1;
}

searchVideos();

database5_17_onClick event:

// back the comments list to the previous page
if (global.startIndexComments-global.maxResultsComments>=1)
global.startIndexComments=global.startIndexComments-global.maxResultsComments;
else
global.startIndexComments=1;

searchComments();


database5_18_onClick event:

// forward the video list to the next page
if (global.startIndexComments+global.maxResultsComments<=global.totalResultsComments)
global.startIndexComments=global.startIndexComments+global.maxResultsComments;
else
{
global.startIndexComments=global.totalResultsComments-global.maxResultsComments;
if (global.startIndexComments<1) global.startIndexComments=1;
}

searchComments();


videoList_canvasClick event:

if (me.id.indexOf('_')==-1) // name does not adjust to name convention of name_n
return;

var arrName=me.id.split('_'); // separate name from number of component
var nameComponent=arrName[0];
var numComponent=arrName[1];

if (nameComponent=='canvVideoList')
{
// the user click on a video of the video list, so we start to play the
// selected video in the chromeless player
if (global.vidPlayer==null)
{
// cromeless video player not instatiated
return;
}
global.vidPlayer.content.loadVideoByUrl(global.videos[numComponent].url);

// set the title and description in the text above of the chromeless player
var t=page.findObject2("/database5_2");
if (t!=null)
{
t.htmlText=""+global.videos[numComponent].title+""+"\n"+global.videos[numComponent].description;
}

// search and display the comments for this video
global.startIndexComments=1;
global.totalResultsComments=0;
global.urlComments=global.videos[numComponent].urlComments;
searchComments();
}


videoList_canvasMouseWheel event:

// highlight the item of the video list where is the mouse pointer
if (global.lastCanvas!=null)
if (global.lastCanvas!=me)
{
global.lastCanvas.setStyle("backgroundColor", 0xffffff);
}

me.setStyle("backgroundColor", 0xaaaaff);
global.lastCanvas=me;


videoList_canvasRollOut event:

// restore the blank color of the item of the video list
me.setStyle("backgroundColor", 0xffffff);


videoList_canvasRollOver event:

// highlight the item of the video list where is the mouse pointer
if (global.lastCanvas!=null)
if (global.lastCanvas!=me)
{
global.lastCanvas.setStyle("backgroundColor", 0xffffff);
}

me.setStyle("backgroundColor", 0xaaaaff);
global.lastCanvas=me;


commentsList_canvasClick event:

// do nothing (for the moment)

commentsList_canvasMouseWheel event:

// highlight the item of the comments list where is the mouse pointer
if (global.lastCanvasComments!=null)
if (global.lastCanvasComments!=me)
{
global.lastCanvasComments.setStyle("backgroundColor", 0xffffff);
}

me.setStyle("backgroundColor", 0xaaaaff);
global.lastCanvasComments=me;


commentsList_canvasRollOut event:

// restore the blank color of the item of the comments list
me.setStyle("backgroundColor", 0xffffff);


commentsList_canvasRollOver event:

// highlight the item of the comments list where is the mouse pointer
if (global.lastCanvasComments!=null)
if (global.lastCanvasComments!=me)
{
global.lastCanvasComments.setStyle("backgroundColor", 0xffffff);
}

me.setStyle("backgroundColor", 0xaaaaff);
global.lastCanvasComments=me;


That's all the events for the YouTube sample. You could enhanced the page adding many more controls to the video player, etc. Because with HB you can make that very easily.

On this post you had learn how to connect to a third party data service, how to send and get data to/from the data service using the httpService object and how to create a user interface dynamically to show the data (on this case video data). You now could use this sample like a starting point to connect to others data services like FaceBook, Flickr, etc. :)


Monday, April 18, 2011

Communicating with data services of third party , YouTube sample - I

Hummingbird allow you communicate with external data services. you can do so, using the http services objects provided by HB. On this post i will show you how to communicate with the data services offered by Youtube, but you could adapt the sample to communicate with others services like the one offered for flickr, panoramio, facebook, etc.
following are two images showing the HB page at design time, with the elements needed to do the sample:


The elements found on the page are:

1. commonWidgets: this widget will allow us create the elements 3,5 and 9. id: database5_3
2. search videos: is a text component, when the user click on it, access the youtube data services, and get a video list corresponding to the words in the element 3 (textInput). id: database5_1
3. textInput: here you enter the words corresponding to the videos you want to get from youtube.
4. text: it show you the title and description of the video you are watching currently. id: database5_2
5. video player: it is the chromeless video player provided by youtube. it allow us play streamed videos directly from the YouTube's servers.
6. play button: play the video. id: database5_5
7. stop button: stop the video you are watching. id: database5_6
8. rewind button: rewind the video. id: database5_8
9. video list: this is an vBox component generated using the cwidgets, it shows you the video list corresponding to the videos that match your search criteria. it show you the videos in a paged way, and you can use the buttons below it to move between pages. When you click on a video on this list the video begins to play.
10. back video list: allow you get the previous video list page. id: database5_9
11. forward video list: allow you get the next video list page. id: database5_10
12. text: shows you the start and end videos showed on the video list, and the total of videos. id: database5_12
13. comments list: this is an vBox component generated using the cwidgets, it shows you the comments list corresponding to the video that is being played. it show you the comments in a paged way, and you can use the buttons below it to move between pages.
14. back comments list: allow you get the previous comments list page. id: database5_17
15. forward comments list: allow you get the next comments list page. id: database5_18
16. text: shows you the start and end comments showed on the comments list, and the total of comments. id: database5_19

The next pictures show you the HB page in action (on visit mode):


One of the things you must know when you try to use data services of third party is the way you will communicate with the data services and the format of the returned data. On this case we will get data from Youtube, so you will have to understand how works the YouTube API, so you must read this:

YouTube API protocol
YouTube API player

The above links will provide you with useful info in order to understand what we will do next.

A first question you could be asking yourself is ¿ why use the YouTube's video player instead the HB video player ? Youtube don't allow you access flv videos directly, instead they provides two video players which allow us play the videos. Maybe by googling sometime you could find some hacks to access flv videos directly from YouTube, but there is not guarantee it keep working , because YouTube is constantly closing that hacks.

Following you can see the scripts of the page in the scripts editor:


and next is the code of every event script:

imports event:

import mx.controls.Alert;
import mx.collections.ArrayCollection;


// create our webService object
global.serv=page.newHttpService();
global.serv.service.url="http://gdata.youtube.com/feeds/api/videos";
global.serv.service.resultFormat="e4x";
global.serv.service.method = "GET";

// the next webservice will be used to retrieve the comments for the played video
global.servComments=page.newHttpService();
global.servComments.service.resultFormat="e4x";
global.servComments.service.method = "GET";

/*
every time a search is made we will save
the results videos in the next variable
*/
global.videos=null;
// the next variable will be our video list component container
global.vb=null;
// the next variable will show us the last canvas of the video list that was higlighted
global.lastCanvas=null;
// the next 3 variables will be used to control the movement of the video list pages
global.startIndex=1;
global.maxResults=10;
global.totalResults=0; // when searching this will be filled with the total numbers of videos


// the next 3 variables will be used to control the movement of the comments list pages
global.startIndexComments=1;
global.maxResultsComments=30;
global.totalResultsComments=0; // when searching this will be filled with the total numbers of comments for the selected video
// the next variable will save the comments for a video
global.comments=null;
// the next variable will be our comments list container
global.vbComments=null;
// the next variable will show us the last canvas of the comments list that was higlighted
global.lastCanvasComments=null;
// the next variable will save the url of the comments for the video being played
global.urlComments=null;

// needed to use the chromeless player of youtube
page.allowDomain("www.youtube.com"); // this allows HB access the chromeless YouTube video player

global.vidPlayer=null; // this will be the chromeless videoPlayer Object

functions event:


function clearCommentsList()
{
if (global.vbComments!=null)
global.vbComments.removeAllChildren();


}


function buildCommentsList()
{
/*
this function take the data of the comments and build a nice
comments list
*/

clearCommentsList();

// get a reference to the cWidget
var cw=page.findObject2("/database5_3");

// get a reference to the vertical box created
var vb=global.vbComments;
if (vb==null)
{
Alert.show("vbox for comments list not created");
return;
}


// loop over our comments list
for (var i = 0 ; i < global.comments.length ; i++)
{
// this is the i-esimal comment of the list


/* the data fields for a comment are:
comment.title
comment.published
comment.updated
comment.content
comment.authorName
*/


// create a text object to show some text of the video
var text=cw.content.application.new_text();
text.y=6;text.x=4;
text.width=vb.width-24;
//text.height=100; // component will be autosized according content
text.autoResize=true;
text.htmlText="TITLE: "+global.comments[i].title+"\nAUTHOR: "+global.comments[i].authorName+"\n"+global.comments[i].content;
text.setStyle("color", 0x000000);
text.id="text"+i;
//text.truncateToFit=true; // dont need truncateToFit
//text.addEvents("click");
text.toolTip=global.comments[i].content;
text.mouseChildren=false;


// create a canvas an locate every above object inside it
var can=cw.content.application.new_canvas();
can.setStyle("backgroundColor", 0xffffff);
can.setStyle("borderStyle", "solid");
can.setStyle("borderColor", 0x000000);
can.setStyle("borderThickness", 1);
can.autoLayout=true;
can.addChild(text);

//can.height=text.y+text.height+4; // canvas will be autoLayout
//can.width=text.x+text.width+4; // canvas will be autoLayout
can.id="canvCommentsList_"+i;
/*
next line: the events of the canvas (rollover,rollOut, etc.) will begin with commentsList prefix
*/
can.addEvents("rollOver|rollOut|click|mouseWheel",'|','commentsList');
can.hScrollPolicy("off");
can.vScrollPolicy("off");
can.buttonMode=true;

// add the canvas with its childrens to the container vBox
vb.addChild(can);

}

} // end of function buildCommentsList


function showOneOfComments()
{
// set the a message like this: 1-10 of 123
var c=page.findObject2("/database5_19");
if (c!=null)
{
c.text=global.startIndexComments+"-"+(global.startIndexComments+global.maxResultsComments-1)+" of "+global.totalResultsComments;
}
}


function searchComments()
{
// this function search for the comments of a video
if (global.urlComments==null)
return;

var startIndex=global.startIndexComments;
var maxResults=global.maxResultsComments;

global.servComments.service.url=global.urlComments;
var params=new Object();
params["max-results"]=maxResults;
params["start-index"]=startIndex;

global.servComments.call(params,"serverResponseComments","serverErrorComments");

}

function create_vBoxComments()
{
var cw=page.findObject2("/database5_3");

// creates a vBox which will be the container for the comments list
var vb=cw.content.application.new_vBox();
// set styles for vBox
vb.setStyle("borderStyle", "solid");
vb.setStyle("borderColor", 0x000000);
vb.setStyle("borderThickness", 1);
vb.setStyle("verticalGap", 0); // vertical space between childrens

vb.height=473;
vb.width=397;
vb.x=34;vb.y=544;
vb.setStyle("backgroundColor", 0xffffff);
page.content.addChild(vb);
global.vbComments=vb;

} // end of function vBoxComments


function setButtonMode()
{
// set buttonMode for search videos button
var pb=page.findObject2("/database5_1");
pb.buttonMode=true;
pb.mouseChildren=false; // this is a text so we need this too

// set buttonMode for the player buttons (play,stop,rewind)
var pb=page.findObject2("/database5_5");
pb.buttonMode=true;
var pb=page.findObject2("/database5_6");
pb.buttonMode=true;
var pb=page.findObject2("/database5_8");
pb.buttonMode=true;

// set button mode for videolist buttons (back video list,forward video list)
var pb=page.findObject2("/database5_9");
pb.buttonMode=true;
var pb=page.findObject2("/database5_10");
pb.buttonMode=true;

// set button mode for commentslist buttons (back comments list,forward comments list)
var pb=page.findObject2("/database5_17");
pb.buttonMode=true;
var pb=page.findObject2("/database5_18");
pb.buttonMode=true;

}

function showOneOf()
{
// set the a message like this: 1-10 of 32456
var c=page.findObject2("/database5_12");
if (c!=null)
{
c.text=global.startIndex+"-"+(global.startIndex+global.maxResults-1)+" of "+global.totalResults;
}
}


function searchVideos()
{
/*
here we send the search request to youtube
*/

//Alert.show(global.serv);

var searchString=global.t.text;
var startIndex=global.startIndex;
var maxResults=global.maxResults;

//global.serv.service.url=global.serv.service.url + "?vq=" + searchString + "&max-results=10";
//global.serv.call(null,"serverResponse","serverError");

var params=new Object();
params["vq"]=searchString;
params["max-results"]=maxResults;
params["format"]=5; // check this video format
params["start-index"]=startIndex;
global.serv.call(params,"serverResponse","serverError");

} // end of search videos function


function create_vBox()
{
var cw=page.findObject2("/database5_3");

// creates a vBox which will be the container for the video list
var vb=cw.content.application.new_vBox();
// set styles for vBox
vb.setStyle("borderStyle", "solid");
vb.setStyle("borderColor", 0x000000);
vb.setStyle("borderThickness", 1);
vb.setStyle("verticalGap", 1); // vertical space between childrens

vb.height=919;
vb.width=430;
vb.x=463;vb.y=97;
vb.setStyle("backgroundColor", 0xffffff);
page.content.addChild(vb);
global.vb=vb;


} // end of function create_vBox


function clearVideoList()
{
if (global.vb!=null)
global.vb.removeAllChildren();


}


function buildVideoList()
{
/*
this function take the data of the videos and build a nice
video list
*/

clearVideoList();

// get a reference to the cWidget
var cw=page.findObject2("/database5_3");

// get a reference to the vertical box created
var vb=global.vb;
if (vb==null)
{
Alert.show("vbox for video list not created");
return;
}

// loop over our video list
for (var i=0; i < global.videos.length ; i++)
{
// this is the i-esimal video of the list

// creates an image object to show a thumbnail for the video
var im=cw.content.application.new_image();
im.source=global.videos[i].thumbnail;
im.id="im"+i;
//im.addEvents("click");
im.y=6;im.x=4;
im.height=150;im.width=150;

// create a text object to show some text of the video
var text=cw.content.application.new_text();
text.htmlText=""+global.videos[i].title+""+"\n"+global.videos[i].description;
text.y=im.y;text.x=im.x+im.width+2;
text.height=100;
text.width=250;
text.setStyle("color", 0x000000);
text.id="text"+i;
text.truncateToFit=true;
//text.addEvents("click");
text.toolTip=global.videos[i].title+"\n"+global.videos[i].description;
text.mouseChildren=false;

/*
// create a play button
var but=cw.content.application.new_button();
but.label="play";
but.height=15;
but.x=90;but.y=140;
but.id="button"+i;
but.visible=false;
but.addEvents("click");
but.data=i;
*/

// create a canvas an locate every above object inside it
var can=cw.content.application.new_canvas();
can.setStyle("backgroundColor", 0xffffff);
can.setStyle("borderStyle", "none");
can.setStyle("borderColor", 0x000000);
can.setStyle("borderThickness", 1);
can.addChild(im);
//can.addChild(but); // si el boton es agregado despues del text inhibe el funcionamiento de los hyperlinks.
can.addChild(text);

can.height=im.y+im.height-30;
can.width=text.x+text.width+4;
can.id="canvVideoList_"+i;
// next line: the events of the canvas (rollover,rollOut, etc.) will begin with videoList prefix
can.addEvents("rollOver|rollOut|click|mouseWheel",'|','videoList');
can.hScrollPolicy("off");
can.vScrollPolicy("off");
can.buttonMode=true;

// add the canvas with its childrens to the container vBox
vb.addChild(can);
}


} // end of function buildVideoList


Friday, March 25, 2011

Creating dynamically user interfaces with the cWidgets widget

This post will show you: how to create dynamically user's interfaces using the cWidgets widget. This widget will let you create various different widgets like text inputs, buttons, combo boxes , check boxes, option buttons, radio buttons, etc.


The first step to use the cWidgets widget is ensure it is in the HB server. for more info about this read the post titled 'accessing databases with Hummingbird and scripting, part I', section 'uploading a widget to the hummingbird server'.
The cWidgets is visible only at design time.
On this case the page we are working on has the name database4. following is at design time:


database4_1 corresponds to the cWidget and database4_2 is a panel component. The code for the different events next:

imports event:

import mx.collections.ArrayCollection; // we need this to use ArrayCollections
import mx.controls.Alert; // needed if we want to show messages alerts

/*
we will use the next variable to syncronize the creation of
the widget cWidget in database4_1 with the creation of
the panel database4_2
*/
global.flag=0; // this variable will allow us to detect when the widget and the panel are created


// The next are needed for communication with the midleware
import Connection; // needed to connect with the midleware
/*
next we create an connection object and stored it in a global variable (con)
for later use
*/
global.con=page.newConnection();
// loading of the loadPolicy file in order to have acces to the remote call procedures
global.con.loadPolicyFile("http://alex.cl/WebServPortalFlex/crossdomain.xml");
// open the connection to the midleware (made with asp.net)
global.con.openConnection("http://alex.cl/WebServPortalFlex/Gateway.aspx");


database4_1_ready event:

global.flag++;
if (global.flag==2) // the widget and the panel are ready, so we create our interface
create_interface();

database4_2_onCreated event:

global.flag++;
if (global.flag==2) // the widget and the panel are ready, so we create our interface
create_interface();

functions event:

function create_interface()
{
/*
this function create our interface dynamically
*/

// get a reference to the cWidget
var o=page.findObject2("/database4_1");
if (o!=null)
{
// use the cWidget reference to create some objects

// create label 'name' and a textInput
var l1=o.content.application.new_label();
l1.text='Name';l1.x=10;l1.y=10;

var t1=o.content.application.new_textInput();
t1.x=60;t1.y=10;t1.width=150;

// create label 'email' and a textInput
var l2=o.content.application.new_label();
l2.text='Email';l2.x=10;l2.y=40;

var t2=o.content.application.new_textInput();
t2.x=60;t2.y=40;t2.width=150;

// create label 'subject' and a textInput
var l3=o.content.application.new_label();
l3.text='Subject';l3.x=10;l3.y=70;

var t3=o.content.application.new_textInput();
t3.x=60;t3.y=70;t3.width=150;

// create label 'recipient' and a comboBox
var l4=o.content.application.new_label();
l4.text="Recipient";l4.x=10;l4.y=110;

var c1=o.content.application.new_comboBox();
c1.editable=false;
c1.x=70;c1.y=110
var dataP=new ArrayCollection();
dataP.addItem({label:'General',data:'0'});
dataP.addItem({label:'Clients',data:'1'});
dataP.addItem({label:'IT dept.',data:'2'});
c1.dataProvider=dataP;
c1.addEvents("change");
c1.toolTip='select the recipient';
c1.height=20;
// apply some styles to the combo

c1.setStyle("cornerRadius", 4);
c1.setStyle("selectionColor", 0xffcc99);
c1.setStyle("rollOverColor", 0xffcc66);


//pa.addChild(o.content.application.new_checkBox());

// create textArea for the message
var t4=o.content.application.new_textArea();
t4.x=10;t4.y=140;t4.width=200;t4.height=100;

// create a 'send' button
var b1=o.content.application.new_button();
b1.label="Send";
b1.x=10;b1.y=260;
b1.toolTip='press this button to send the message';
b1.id="send";
b1.addEvents("click");

// create a 'clear' button
var b2=o.content.application.new_button();
b2.label="Clear";
b2.x=100;b2.y=260;
b2.toolTip='press this button to clear all the data';
b2.id="clear";
b2.addEvents("click");

// we will add the above objects inside a panel
// we get a reference to the panel
var pa=page.findObject2("/database4_2");
if (pa!=null)
{
// now we add the just created objects to the panel
pa.addChild(l1);
pa.addChild(l2);
pa.addChild(l3);

pa.addChild(t1);
pa.addChild(t2);
pa.addChild(t3);
pa.addChild(l4);
pa.addChild(c1);
pa.addChild(t4);


pa.addChild(b1);
pa.addChild(b2);

/*
save references to texinputs, combobox and textarea into
global variables for use in others events
*/
global.t1=t1;
global.t2=t2;
global.t3=t3;
global.c1=c1;
global.t4=t4;

}

}


} // end of function create_interface


On the above script you must notice the line where i put an id to the buttons and the line using the addEvents method. These lines will allow us work with the click events of the both buttons in order to detect when the user click the 'send' or 'clear' button, like you will see later.

These are all our events for the moment. you can see them on the scripts window next:


At this point you will have the interface, but it don't make anything when the user press the buttons, for that you will need add the next event:

database4_1_buttonClick event:

/*
this event script will be called for all the click events of the
buttons created with the cWidget database4_1
you can identify every button for its id property like showed below
*/

switch(me.id)
{
case 'send':
// send button pressed

var name=global.t1.text;
var email=global.t2.text;
var subject=global.t3.text;
var recipient=global.c1.selectedLabel;
var message=global.t4.text;

// you must validate the data according some criteria

// after validation you proceed to send the message
global.con.call("WebServPortalFlex.servicios.sendMail","serverResponse","serverError",name,email,subject,recipient,message);
break;
case 'clear':
// clear button pressed
global.t1.text="";
global.t2.text="";
global.t3.text=""
global.c1.selectedIndex=0;
global.t4.text="";
break;
}

serverResponse event:

Alert.message("your message was sended");

serverError event:

Alert.message("there was an error trying to send your message");


On the sample showed on this post you must create the midleware code that receive the data from the HB page and send the email, using (on this case) asp.net. if you need more info about creating the midleware layer with asp.net read the post titled "Accessing databases with hummingbird and scripting part II".
A nice thing about locate the interface inside the panel is that you can move the panel with the mouse on the designer, in order to locate all the interface inside it where you want. :)


Wednesday, March 9, 2011

Creating menus with the hb_menuBar widget

This post will show you: how to create dinamically menus using the hb_menuBar widget like showed on the next picture:


The hb_menuBar widget let you create menu bars which contains drop down menus. This menus are defined using a simple xml syntax, and you can control the appearance of the menu using styles.
You can create as many menuBars like you need using the same hb_menuBar widget.

The first step is upload the hb_menuBar widget to the HB server, for an explanation about how to upload a widget read the post entitled 'Accessing databases with Hummingbird and scripting part I' and the section entitled 'Uploading a widget to the Hummingbird server'.

Once you have upload the hb_menuBar widget to the HB server. you must put the widget onto a HB page, like showed on this picture:


On the above image you can see the widget on the upper right corner. This widget is only visible at design time.
The steps to create a menuBar using the hb_menuBar widget:
- get access to the instance of hb_menuBar widget.
- create a new instance of a menu using the instance of the hb_menuBar.
- set the options of the menu with xml using the setXml method of the widget.
- set some properties like the width, height, etc.
- set some styles for the menu in order to change its appearance.
- add the menu instance to a container (using the addChild method) in order to make it visible to the user. this container could be the page object (page.content.addChild) or a panel object that is visible to the user.

following is the code corresponding to every step described:

// get access to the menuBar widget instance
var mb=page.findObject2("/database2_2");
// create a new menu using the hb_menuBar instance
var m=mb.content.application.new_menu();
/*
set the options of the menu into a string variable with xml
in the xml string the 'label' attribute is the text for the menu's option and the 'data' attribute is used to identify the option selected for the user
*/
var menus=''+
' <root>'+
' <menuitem label="Home" data="1"/>'+
' <menuitem label="Products" data="0">'+
' <menuitem label="Cms software" data="2"/>'+
' <menuitem label="CMR" data="3"/>'+
' </menuitem>'+
' <menuitem label="About us" data="0">'+
' <menuitem label="Who we are" data="4"/>'+
' <menuitem label="Clients" data="5"/>'+
' <menuitem label="Partners" data="6"/>'+
' </menuitem>'+
' <menuitem label="Contact" data="0"> '+
' <menuitem label="Send us a message" data="7"/>'+
' <menuitem label="Address" data="8"/>'+
' </menuitem>'+
' </root>';


m.setXml(menus); // pass the xml with the options to the widget

// set the width of the menu to 100 percent of its container
m.percentWidth='100';
//m.height=30; // set the height of the menu

// set some styles for the menu
m.setStyle('cornerRadius', 0);
m.setStyle('letterSpacing', 1);
m.setStyle('fillColors',[0x3333ff, 0x0066ff]);
m.setStyle('rollOverColor',0x0033cc);
m.setStyle('color', 0xffffff);
m.setStyle('textRollOverColor', 0xffffff);
m.setStyle('themeColor', 0x0066ff);
m.setStyle('fontFamily', 'Times New Roman');;
m.setStyle('fontSize', 20);
m.setStyle('fontWeight', 'normal');
m.setStyle('fontStyle', 'italic');
m.setStyle('textIndent', 0);
m.setStyle('borderColor', 0x333399);
m.setStyle('borderStyle','none');
m.setStyle('fillAlphas',[1, 1]);
// we set the background color for the dropdown menus
var ms=new CSSStyleDeclaration(".myMenuBar"); // we create a CSS
ms.setStyle("backgroundColor",0x000000);
//ms.setStyle("backgroundAlpha",0.5);
m.setStyle('menuStyleName',"myMenuBar");


/*
add the menu to a panel, remember that the menu width
will be 100 percent of the width of its container, on this case
the container is the panel
*/
var o=page.findObject2("/database2_3"); // get a reference to the panel
if (o!=null)
{
// if you need center the menu onto the page uncomment the next line
//o.parent.x=page.content.width/2-o.parent.width/2;
o.addChild(m); // add the menuBar to the panel

}


we write the above code in the ready event of the hb_menuBar widget, like showed here:


The reason why we put the above code on the ready event of the widget is this:
Every widget triggers a 'ready' event when is initialized, let say when is just created, so this event is the ideal place to put our code in order to create a widget's instance when the page is just loaded into the user's browser, because that will be the moment when our widget will be created and the 'ready' event will be triggered. You must take into account that the video, the text, the panel and the picture are not widgets, they are built-in components and they don't trigger a 'ready' event, but if you need to execute some code when these built-in components are just created you can use the 'onCreated' event of the built-in component.

after follow the steps described above you will have a nice menuBar on your HB page. But there is a question for resolve and is ¿ how do you execute an action when the user selects an option ?.
This is simple: when the user selects an option the widget will trigger and event called 'menuClick' and it passes to the event a parameter called 'data' which corresponds to the 'data' attribute defined for you on the xml string for the menu. watch the following code located in the menuClick event of the hb_menuBar widget:

/*
this event is triggered when a user makes click on some option
of the menu, every option must have a data property which is passed
to this event in the info.data parameter, so you will know what option
was clicked by watching for this data
*/

if (info.data==0)
return;
// show a little message with the data attribute of the option selected
Alert.show("option choosed:"+info.data);
// now you must exec some action in response to the selected option
switch (info.data)
{
case '1': // home

break;
case '2': // cms software

break;
case '3': // cmr

break;
case '4': // who we are

break;
default: // others options

break;
};

you will see the above code on this picture:


That is, now you have completed all the steps to have a nice menuBar on your page. :)

a nice feature about the menuBar widget is that you can change the options of the menu at runtime, lets say you can add, replace o remove any option of the menu to adapt the menu according some criteria, like for example the perfil of the user that visits the page. You can disable an option using the 'enabled' attribute with a value of false.
On the next picture you can see how using a button labeled 'change menu' we change the options of the menu when the visitor click on the button:


On the above picture you see how we added a last line of code to the 'ready' event of the hb_menuBar widget (database2_2_ready) in order to store a reference to the menu. this reference will allow us modify the menu in other events. On this case we will change the menu's options in the click event of the button 'database2_4' . you can see the code of the event on the next picture:


On the image you can see that using the setXml method of the menuBar with a new set of options the menu is refreshed automatically on the page. watch that we are using the 'enabled' attribute with a value of false to disable the option labeled 'CMR'.
On the next image you can see the menu with the new options set, just after we clicked the 'change menu' button:


A last note above the hb_menuBar widget: you can control the transparency level of the drop down menus, like you see on this picture:


nice :)

Wednesday, February 23, 2011

Displaying data with the hb grid widget

The last posts show you how to get data records from a backend, and how to display them on a grid object using a widget. now is time to see the hb_grid in more detail.
Like you know the hb_grid widget let you show data in a tabular way. you can create many instances of a grid using only an hb_grid widget, like is shown on this image:

Every instance is completely independent from the others instances of the widget.
You use the dataProvider property to indicate to a grid where are the data to be show.
The data showed on a grid are tied to the variable containing those data when you use the dataProvider property with an arrayCollection variable, and if the user modify some data item on a grid he (she) really modify the variable containing that data.
now look at the following image:


The property that allow edit the data showed on a grid is the editable property, you must note that the grid has a editable property and the dataGridColumn has an editable property too, but this last one, if not indicated, is set to true by default.
Now watch this image:


On the above image there are two grids (grid1 and grid2), created using the same hb_grid widget, the left most grid (grid1) has its editable property set to true and the right most grid (grid2) has its editable property set to false, however when we change any data item on the grid 1 automatically the data are refreshed on the grid 2, like you can see on the second row (the 'titulo' column).
If you want to add a new row (either with data or not) you must to add the data to the dataProvider variable not to the widget, lets say you add the data to the variable containing the data for the grid.
in the same way if you want to delete a data row from the hb_grid widget you only must delete it in the variable associated to the dataProvider property.
The widget always is refreshed automatically when you change a data, add rows, or delete rows from the variable associated with the widget.
The variable that you assign to the dataProvider is a variable of type array or arrayCollection, where every element into the array corresponds to a data row in the grid, and every one of this elements really is an object with attributes which will be the columns (fields) of the hb_grid.
do you remember the previous posts ? there you find a line in the serverResponse event that look so:

var registros=page.loadArrayCollection(result.Table.serverInfo);

that line takes the data returned from the midleware and convert them into an arrayCollection, which could be used with the hb_grid. when the data are converted into the arrayCollection every data row (data base row) returned from the midleware is converted into a element (object) of the arrayCollection, and each element (object) into the array will has so many attributes like data fields (data base columns) has the returned rows .
to clarify this look this code:

// using an arrayCollection will ensure that the data are automatically refreshed
// the variable registros could be used assigned later to the dataProvider of an hb_grid widget
var registros=new ArrayCollection();
registros.addItem({id:10,name:"alex araya",valor:true});
registros.addItem({id:12,name:"jaime araya",valor:false});

the above code creates an arrayCollection with two elements. Its equivalent using an array is:

var registros=new Array();
registros.push({id:10,name:"alex araya",valor:true});
registros.push({id:12,name:"jaime araya",valor:false});

here we are constructing our array in a harcoded way. The first line creates a empty array, on the second we push our first element (data record) into the array with three attributes (data fields). this attributes are id, name and valor (value). the third line creates another data record into the array with the same attributes and other values for every attribute. this array could be used later like a dataProvider for the hb_grid.

Other useful properties of the hb_grid are:
selectedItem: it is an object that represents the selected row of the hb_grid, is null if there is no one row selected.
selectedIndex: it is a number representing the subscript in the array of the selected item of the hb_grid.
alpha: is the alpha transparency value of the hb_grid . Valid values are 0 (fully transparent) to 1 (fully opaque). The default value is 1. objects with alpha set to 0 are invisible.
enabled: (true/false) indicates whether the component (hb_grid) can accept user interaction.
id: is a string corresponding to the ID of the hb_grid. it could be useful to identify the hb_grid that has triggered an event, like you'll see later.
showHeaders: (true/false) indicates whether the widget should show column headers.
visible: (true/false) if true the hb_grid is visible, if false is invisible.
selectedItem: Represents a reference to the selected item in the data provider, if there is no item selected it will be null.
selectedIndex: is the index in the data variable (dataProvider property) of the selected item. If there is no selected item it will be -1.

The events triggered for the hb_grid are the following:

item_change: executed when
selectedIndex or selectedItem property changes as a result of user interaction. The parameters passed to your event script for this event are:
me: is the hb_grid instance that triggered the event.
info: is an object that in the case of this event will have the following attributes:
info.row: is the row of the hb_grid's cell where the user is now.
info.col: is the col of the hb_grid's cell where the user is now.

item_click: executed when the user click on a cell of the grid. The parameters passed to your event script for this event are:
me: is the hb_grid instance that triggered the event.
info: is an object that in the case of this event will have the following attributes:
info.row: is the row of the hb_grid's cell where the user made click.
info.col: is the col of the hb_grid's cell where the user made click.

item_editBeginning: executed when the user begins the editing of a cell. The parameters passed to your event script for this event are:
me: is the hb_grid instance that triggered the event.
info: is an object that in the case of this event will have the following attributes:
info.row: is the row of the hb_grid's cell being edited.
info.col: is the col of the hb_grid's cell being edited.
dataField: is the name of the field or property in the data associated with the item's column.


item_editEnd: executed when the user ends the editing of a cell. The parameters passed to your event script for this event are:
me: is the hb_grid instance that triggered the event.
info: is an object that in the case of this event will have the following attributes:
info.row: is the row of the hb_grid's cell being edited.
info.col: is the col of the hb_grid's cell being edited.
dataField: is the name of the field or property in the data associated with the item's column.
This event is cancelable, meaning that if you event script returns false, the value entered by the user will be rejected. This is useful for custom data validation.


The above image show you two grids (grid1 and grid2). Every event triggered for the grid2 (the right most grid) is registered in a text component trough scripting, so we can watch the moment when a event is triggered for the hb_grid.

The hb_grid allows you using other controls for data input instead of the default text control, like you see on the next image where you can see a combo box:


At the present the controls that you can use for editing a cell are:
- ComboBox
- CheckBox
- Text Input
- Button
- NumericStepper


post not ended...

Monday, February 21, 2011

Accessing databases with Hummingbird and scripting part II

On this post you will see how to create the midleware layer for our database sample application. we will use asp.net+fluorineFX framework.
If you had never used fluorineFX, you can visit:
http://www.fluorinefx.com/

if you want to learn how to preparing an asp.net project in order to use the fluorineFX framework visit:
http://www.fluorinefx.com/docs/fluorine/index.html

is very simple using fluorineFX with asp.net, and like you will see on the official documentation, you must to add a reference on the asp.net project to the fluorineFX framework, and then you are ready to coding.
You must to create a new project called 'WebServPortalFlex'.
Once you have your project configured to use fluorineFX, you must to create a new class called 'servicios' like you see on the following picture:


write a function called ejecuta_query and a function called obtenerPaginasUsuario inside the class servicios, with the following code:


private DataSet ejecuta_query(String query)
{

// you must to change the conexion variable to use your own conexion string
String conexion="server=localhost;database=dbtest;uid=dbuserid;pwd=dbpassword;";

SqlConnection con=new SqlConnection(conexion);
DataSet ds=new DataSet();
SqlDataAdapter da = new SqlDataAdapter(query,con);
try
{
da.Fill(ds);
}
catch(Exception er)
{
con.Close();
return ds;
};

con.Close();
return ds;

}


public DataSet obtenerPaginasUsuario(string username)
{
DataSet ds;
int regs;
string query="exec sp_obtenerPaginasUsuario '"+username+"'";
ds=ejecuta_query(query);
regs=ds.Tables[0].Rows.Count;
if (regs==0)
{
// return some info to the front end to indicate that there is no rows
}

return ds;

}

That's all, now you have finished the midleware layer, it has only a remote procedure (function) called obtenerPaginasUsuario. this function will be called for the front end.


Now you will must write your backend logic in the sql server database.

first you must be sure that there is a database on the sql server engine, with the name that you pretend to use in the conexion string of the asp.net project. next you must be sure that inside this database there is a user account with the username and password that you are using in the conexion string.
The next step is to create the table that will store the data. this table has the following structure:

CREATE TABLE tb_pagina (
cod_pag varchar (100) ,
correlativo int ,
titulo varchar(255),
username varchar (50) ,
fecha_creacion datetime ,
fecha_modificacion datetime
)

Then you must to insert some records for testing later our app.

Then you must to create a new stored procedure with the following code:

create proc sp_obtenerPaginasUsuario(@username varchar(50))
as
begin

create table #paginas(cod_pag varchar(100),titulo varchar(255),fecha_creacion datetime,
fecha_modificacion datetime);

insert into #paginas select distinct cod_pag,titulo,fecha_creacion,fecha_modificacion
from tb_pagina where username=@username

select '0' as cod,'' as men,a.cod_pag,a.titulo,convert(varchar,a.fecha_creacion,103) as fecha_creacion,
convert(varchar,a.fecha_modificacion,103) as fecha_modificacion
from #paginas a order by convert(datetime,a.fecha_creacion)

end


you must give to the above stored procedure the permissions to get records from the database, and you must be sure that the user's account that you are using on the 'conexion' string variable is granted to execute the stored procedure.

That's all, now you finished the back end logic. now is time for test our front end:

open a web browser, and visit the Hummingbird page created, you must see something like this:


Remember that the hb_grid widget is invisible in visit mode, that's the reason why it no appears on the above image. Now click on the 'get rows' text and you will see a grid with the records retrieved from the database like showed on this image:

Great, on these posts you have learned how to access a backend, retrieve records from it, create a grid dinamically and show data on it. Remember that this is only a very simple sample and there is very much that you can make with HB.
On the next post i will show you the hb_grid widget with more details, so you will have a more complete understanding about it and how it integrates inside HB.

Have a nice day... :)

Sunday, February 20, 2011

Accessing databases with Hummingbird and scripting part I

Although Hummingbird is a powerful tool for creating content for the web, there was situations where it did not had a way to help the users. i mean to the following situation:
Suppose that you have some information stored in a server, this server is accessible for Hummingbird. you want that Hummingbird (HB) access that data in order to displaying on a page created with it, or may be you could want to get some data input from the users, and save the data entered for the users in the server.
The good news are that now HB allow you to accessing your own data stored in other servers.
HB works like a three layers architecture. watch the following image:

The above image show you the three layers that interacts in order to get or store some data on a backend (database) server. let me give you a little explanation of every of them:

1. Front end layer: this is web content (page) created with Hummingbird, it executes (run) on the client (your pc). The users interacts with it in order to get or store some kind of info from the server. The front end makes requests to the midleware passing it parameters (if necesary) in order to get or store some info from the backend.

2. Midleware layer: This acts like an intermediary between the front end and the back end, it receives the parameters from the front end, validating them, and processing the request making (if necesary) a midleware request to the backend. passing parameters (if necesary) to it., then it takes the response from the backend and prepares its response sending it to the front end. you must implement (programming) this layer, because only you know the way that the midleware will manage the data to (from) the backend server. This layer could be an asp.net app, a java app, or anything that could receive (send) remoting procedure calls (RPC).

3. Backend layer: tipically is the database logic, implemented in a database engine (sql server, my sql, oracle, etc.). When the midleware makes a request to the backend tipically it executes an stored procedure on the data base server, then the stored procedure (sp) gets the data from the database and returns them to the midleware (a request to get data), or saves some info on the server (a request to store data). You must implement this layer, let say creating the sp's, tables, and every thing necesary in order to the midleware can comunicates with the backend.

now i will show a sample that implements every one of the layers in order to make a simple database request. The request will return several rows from the database and HB will show this rows on a page in tabular way using a grid object (implemented like a widget).
For the sample we will use the following:
- For the front end we will use obviously HB.
- For the midleware we will use asp.net + fluorineFX, fluorineFX is a framework that allow to an asp.net application managing remoting procedure calls. For more info visit: http://www.fluorinefx.com/. you could use any other language supporting RPC.
- For the backend logic we will use sql server, but you could use any other database engine.

1. first we will create an HB page:
enter to HB using your account. I will use an account called database, so my first page created with this account will be called database1.
select the database1 page and press the button 'ir al diseñador' ('go to the designer' ) on the control panel.


now you are in the designer. So press the button that says 'texto' (text) to create a text object with the text 'get rows', i will use this like a button to be clicked in order to get the records, but you could use other object that responds to a click event:


Uploading a widget to the Hummingbird server

The next step is upload a widget to the HB server. i had called this widget hb_grid because it allow you to show records in a tabular way. You must upload the widget like any other widget, let say like an image, so first you must press the 'foto' (picture) button on the tools panel, and you will see:


then press the 'subir imagen' (upload image) button, you will be presented with a little window, then press the 'elejir archivos' (choose files) button and navigate to the folder where is located the swf for the widget, like showed on this image:


when you select the file for the widget you will see a button on the little window with the text 'upload', you must press on it in order to begin the upload of the widget.

When the upload is finished you must to return to the create image window and select the just uploaded widget, and press the aplicar (apply) button, like showed on this picture:


so now you will see a widget on your page that says grid widget:


This widget is visible only in desing mode, but in visit mode is invisible. we will use this widget to show the data base rows inside a grid (in tabular way).
Now we will write some scripts to get the data to be shown. go to the 'edicion' (edition) menu and choose the 'script' option. you will see the scripts window. there you must write an imports event with the following code:

import mx.controls.Alert; // used to display little messages on the page
import Connection; // needed to connect with the midleware
/*
next we create a connection object and store it in a global variable (con)
for later use
*/
global.con=page.newConnection();
// loading of the loadPolicy file in order to have acces to the remote call procedures
global.con.loadPolicyFile("http://alexaraya.cl/WebServPortalFlex/crossdomain.xml");
// open the connection to the midleware (made with asp.net)
global.con.openConnection("http://alexaraya.cl/WebServPortalFlex/Gateway.aspx");

/*
the nexts imports will allow to create a datagrid and the necesary columns to
present the data to the user
*/
import mx.controls.DataGrid;
import mx.controls.dataGridClasses.DataGridColumn;


Like showed on this pic:


Remember that the imports event is the first in executing when a page is loaded on the client, so the above code will be executed before any other code on the page.
sure you are asking you what is the policy file. it is a file that must be located on the same directory of the asp.net application in order to give access to our front end to the remote access procedures contained on the midleware. the policy file is simply an xml file containing the following:


this file must be created for you and located in the same folder like the asp.net application.

Now we write the logic for the 'get rows' button (the onClick event):

/* when the user press the "get rows" button we execute a remote
procedure called "obtenerPaginasUsuario" that returns all the pages of
a user, on this case the name of the user is jaime
if we get a positive response from the midleware the serverResponse event
will be triggered, and if there was an error the serverError event will be triggered
*/

global.con.call("WebServPortalFlex.servicios.obtenerPaginasUsuario","serverResponse","serverError","jaime");

like i will show you in the next post , 'WebServPortalFlex' is the nameSpace in the asp.net project where is the procedure to be executed, servicios is a classname in the same asp.net project and obtenerPaginasUsuario is the name of the remote procedure (function) to be executed.

The next picture shows the onClick event for the button:

now we write the script for the response event:

/*
this event is executed when the midleware returns info succefuly.
first we convert the records into an arrayCollection object that can be used
for the grid. the records returned from the midleware are in the result
parameter
*/
var registros=page.loadArrayCollection(result.Table.serverInfo);

/* we create a datagrid using the hb_grid widget contained in
the database1_2 object (an image object)
*/
var o=page.findObject2("/database1_2");
var dg=o.content.application.new_grid();
/* now we create the columns for the datagrid */
var columns=new Array();
var c1=new DataGridColumn();
c1.dataField="cod_pag";
c1.headerText="codigo pagina";
c1.editable=false;
c1.width=100;
columns.push(c1);
var c2=new DataGridColumn();
c2.dataField="titulo";
c2.headerText="titulo";
c2.editable=false;
c2.width=300;
columns.push(c2);
dg.columns=columns; // assign the columns to our new grid
// let know to the datagrid where are the data to be used
dg.dataProvider=registros;
/* adjust some properties like the position on the page for the grid,
row height, etc.
*/
dg.x=100;dg.y=100;dg.height=500;
dg.rowHeight=30;
dg.showHeaders=true;
/*put some styles for the grid like colors for the rows,
header colors, font , etc.
*/
dg.setStyle("alternatingItemColors", [0x9999cc, 0x9999ff]);
dg.setStyle("headerColors", [0x9999ff, 0xcccccc]);
dg.setStyle("color", 0x0B333C);
dg.setStyle("rollOverColor",0xcc3366);
dg.setStyle("selectionColor", 0xcc9900);
dg.setStyle("fontFamily", "Courier");
dg.setStyle("fontSize", 11);
dg.setStyle("horizontalGridLines", true);
dg.setStyle("verticalGridLineColor", 0xffffff);
// add the datagrid to the page in order to be visible to the user
page.content.addChild(dg);


this is showed on this picture:


the last step to end our HB page is write the script for the serverError event:

Alert.show("an error ocurred on the midleware"); // shows a message to the user


like showed on this image:


That's all, now we ended our front end. The next step is create the midleware (with asp.net) and the backend logic (with sql server). I will show you the way in the next post...