Although Hummingbird is a powerful tool for creating content for the web, there was situations where it did not had a way to help the users. i mean to the following situation:
Suppose that you have some information stored in a server, this server is accessible for Hummingbird. you want that Hummingbird (HB) access that data in order to displaying on a page created with it, or may be you could want to get some data input from the users, and save the data entered for the users in the server.
The good news are that now HB allow you to accessing your own data stored in other servers.
HB works like a three layers architecture. watch the following image:
The good news are that now HB allow you to accessing your own data stored in other servers.
HB works like a three layers architecture. watch the following image:
 The above image show you the three layers that interacts in order to get or store some data on a backend (database) server. let me give you a little explanation of every of them:
1. Front end layer: this is web content (page) created with Hummingbird, it executes (run) on the client (your pc). The users interacts with it in order to get or store some kind of info from the server. The front end makes requests to the midleware passing it parameters (if necesary) in order to get or store some info from the backend.
2. Midleware layer: This acts like an intermediary between the front end and the back end, it receives the parameters from the front end, validating them, and processing the request making (if necesary) a midleware request to the backend. passing parameters (if necesary) to it., then it takes the response from the backend and prepares its response sending it to the front end. you must implement (programming) this layer, because only you know the way that the midleware will manage the data to (from) the backend server. This layer could be an asp.net app, a java app, or anything that could receive (send) remoting procedure calls (RPC).
3. Backend layer: tipically is the database logic, implemented in a database engine (sql server, my sql, oracle, etc.). When the midleware makes a request to the backend tipically it executes an stored procedure on the data base server, then the stored procedure (sp) gets the data from the database and returns them to the midleware (a request to get data), or saves some info on the server (a request to store data). You must implement this layer, let say creating the sp's, tables, and every thing necesary in order to the midleware can comunicates with the backend.
now i will show a sample that implements every one of the layers in order to make a simple database request. The request will return several rows from the database and HB will show this rows on a page in tabular way using a grid object (implemented like a widget).
For the sample we will use the following:
- For the front end we will use obviously HB.
- For the midleware we will use asp.net + fluorineFX, fluorineFX is a framework that allow to an asp.net application managing remoting procedure calls. For more info visit: http://www.fluorinefx.com/. you could use any other language supporting RPC.
- For the backend logic we will use sql server, but you could use any other database engine.
1. first we will create an HB page:
enter to HB using your account. I will use an account called database, so my first page created with this account will be called database1.
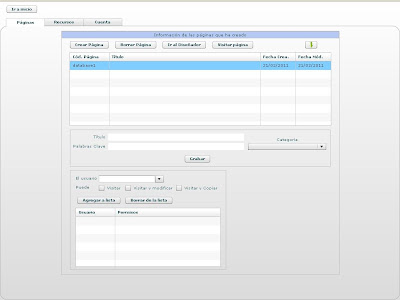
select the database1 page and press the button 'ir al diseñador' ('go to the designer' ) on the control panel.
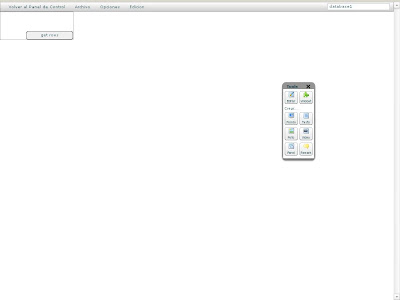
now you are in the designer. So press the button that says 'texto' (text) to create a text object with the text 'get rows', i will use this like a button to be clicked in order to get the records, but you could use other object that responds to a click event:
Uploading a widget to the Hummingbird server
The next step is upload a widget to the HB server. i had called this widget hb_grid because it allow you to show records in a tabular way. You must upload the widget like any other widget, let say like an image, so first you must press the 'foto' (picture) button on the tools panel, and you will see:
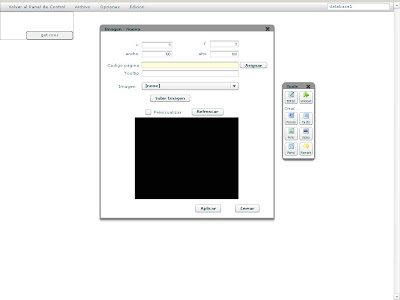 then press the 'subir imagen' (upload image) button, you will be presented with a little window, then press the 'elejir archivos' (choose files) button and navigate to the folder where is located the swf for the widget, like showed on this image:
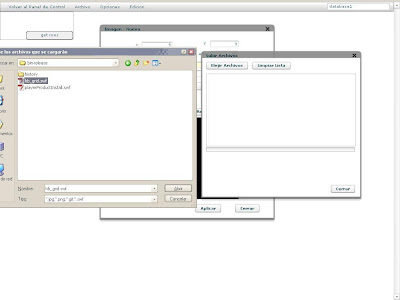
when you select the file for the widget you will see a button on the little window with the text 'upload', you must press on it in order to begin the upload of the widget.
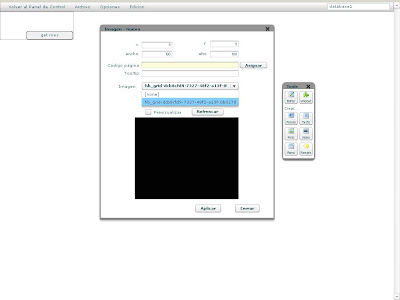
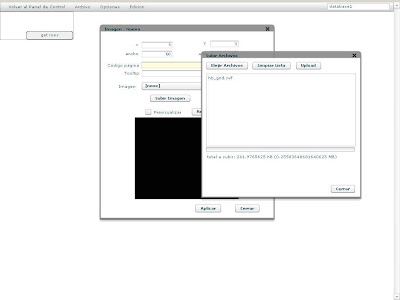 When the upload is finished you must to return to the create image window and select the just uploaded widget, and press the aplicar (apply) button, like showed on this picture:
so now you will see a widget on your page that says grid widget:
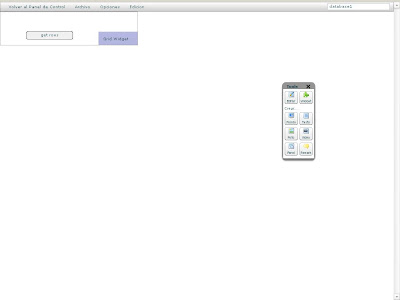
This widget is visible only in desing mode, but in visit mode is invisible. we will use this widget to show the data base rows inside a grid (in tabular way).
Now we will write some scripts to get the data to be shown. go to the 'edicion' (edition) menu and choose the 'script' option. you will see the scripts window. there you must write an imports event with the following code:
import mx.controls.Alert; // used to display little messages on the page
import Connection; // needed to connect with the midleware
/*
next we create a connection object and store it in a global variable (con)
for later use
*/
global.con=page.newConnection();
// loading of the loadPolicy file in order to have acces to the remote call procedures
global.con.loadPolicyFile("http://alexaraya.cl/WebServPortalFlex/crossdomain.xml");
// open the connection to the midleware (made with asp.net)
global.con.openConnection("http://alexaraya.cl/WebServPortalFlex/Gateway.aspx");
/*
the nexts imports will allow to create a datagrid and the necesary columns to
present the data to the user
*/
import mx.controls.DataGrid;
import mx.controls.dataGridClasses.DataGridColumn;
Like showed on this pic:
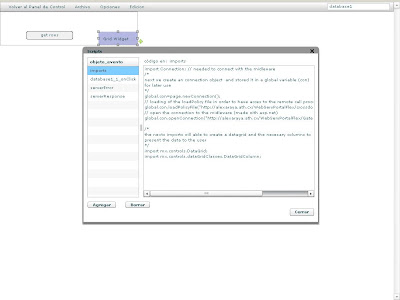
Remember that the imports event is the first in executing when a page is loaded on the client, so the above code will be executed before any other code on the page.
sure you are asking you what is the policy file. it is a file that must be located on the same directory of the asp.net application in order to give access to our front end to the remote access procedures contained on the midleware. the policy file is simply an xml file containing the following:
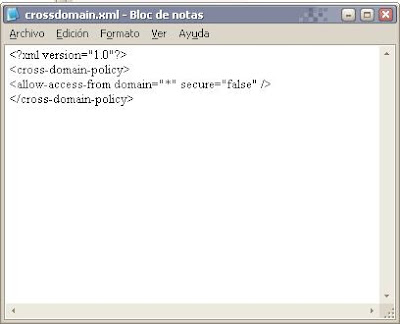
this file must be created for you and located in the same folder like the asp.net application.
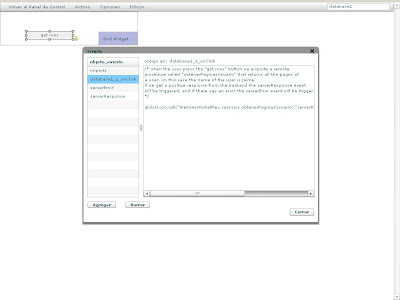
Now we write the logic for the 'get rows' button (the onClick event):
/* when the user press the "get rows" button we execute a remote
procedure called "obtenerPaginasUsuario" that returns all the pages of
a user, on this case the name of the user is jaime
if we get a positive response from the midleware the serverResponse event
will be triggered, and if there was an error the serverError event will be triggered
*/
global.con.call("WebServPortalFlex.servicios.obtenerPaginasUsuario","serverResponse","serverError","jaime");
like i will show you in the next post , 'WebServPortalFlex' is the nameSpace in the asp.net project where is the procedure to be executed, servicios is a classname in the same asp.net project and obtenerPaginasUsuario is the name of the remote procedure (function) to be executed.
The next picture shows the onClick event for the button:
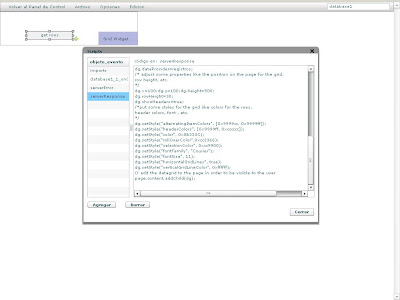
 now we write the script for the response event:
/*
this event is executed when the midleware returns info succefuly.
first we convert the records into an arrayCollection object that can be used
for the grid. the records returned from the midleware are in the result
parameter
*/
var registros=page.loadArrayCollection(result.Table.serverInfo);
/* we create a datagrid using the hb_grid widget contained in
the database1_2 object (an image object)
*/
var o=page.findObject2("/database1_2");
var dg=o.content.application.new_grid();
/* now we create the columns for the datagrid */
var columns=new Array();
var c1=new DataGridColumn();
c1.dataField="cod_pag";
c1.headerText="codigo pagina";
c1.editable=false;
c1.width=100;
columns.push(c1);
var c2=new DataGridColumn();
c2.dataField="titulo";
c2.headerText="titulo";
c2.editable=false;
c2.width=300;
columns.push(c2);
dg.columns=columns; // assign the columns to our new grid
// let know to the datagrid where are the data to be used
dg.dataProvider=registros;
/* adjust some properties like the position on the page for the grid,
row height, etc.
*/
dg.x=100;dg.y=100;dg.height=500;
dg.rowHeight=30;
dg.showHeaders=true;
/*put some styles for the grid like colors for the rows,
header colors, font , etc.
*/
dg.setStyle("alternatingItemColors", [0x9999cc, 0x9999ff]);
dg.setStyle("headerColors", [0x9999ff, 0xcccccc]);
dg.setStyle("color", 0x0B333C);
dg.setStyle("rollOverColor",0xcc3366);
dg.setStyle("selectionColor", 0xcc9900);
dg.setStyle("fontFamily", "Courier");
dg.setStyle("fontSize", 11);
dg.setStyle("horizontalGridLines", true);
dg.setStyle("verticalGridLineColor", 0xffffff);
// add the datagrid to the page in order to be visible to the user
page.content.addChild(dg);
this is showed on this picture:
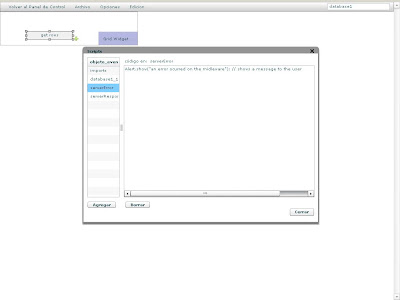
the last step to end our HB page is write the script for the serverError event:
Alert.show("an error ocurred on the midleware"); // shows a message to the user
like showed on this image:
That's all, now we ended our front end. The next step is create the midleware (with asp.net) and the backend logic (with sql server). I will show you the way in the next post...


No comments:
Post a Comment